树莓派连接BMP085数字压力传感器
我最近买了一块基于BMP085数字压力传感器的模块(GY-65),所以应该写一篇关于如何从树莓派中读取BMP085传感器数据的文章,树莓派读取BMP085的数据是通过SMbus总线来完成的。SMBus(System Management Bus)是I2C协议的一个子集。
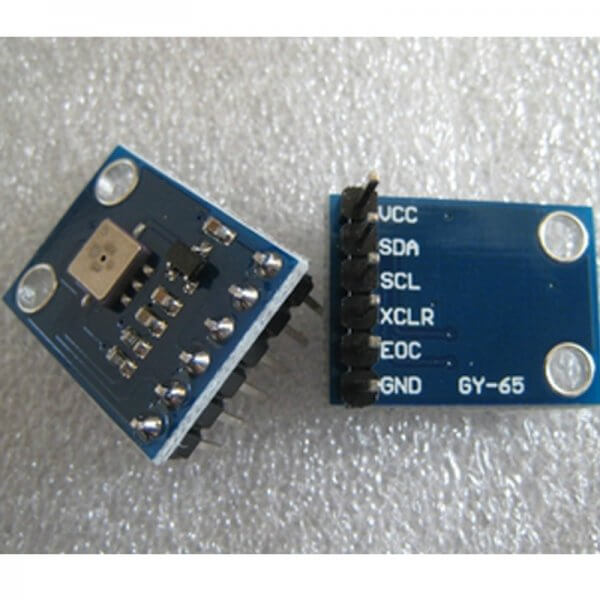
GY65的价格参考
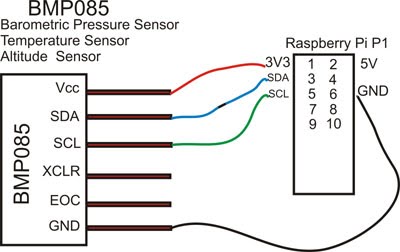
GY65与树莓派的连接可参考下图
Python代码
下面是简单的测试代码,代码首先对BMP085气压传感器进行初始化,然后通过不断地循环来读取温度和气压数据。下面是具体的Python代码:
#!/usr/bin/python
import smbus
import time

bus = smbus.SMBus(0) # 如果树莓派版本是2.0,那么“ bus = smbus.SMBus(1) ”
address = 0x77

def read_byte(adr):
    return bus.read_byte_data(address, adr)

def read_word(adr):
    high = bus.read_byte_data(address, adr)
    low = bus.read_byte_data(address, adr+1)
    val = (high << 8) + low
    return val

def read_word_2c(adr):
    val = read_word(adr)
    if (val >= 0x8000):
        return -((0xffff - val) + 1)
    else:
        return val

def write_byte(adr, value):
    bus.write_byte_data(address, adr, value)

def twos_compliment(val):
    if (val >= 0x8000):
        return -((0xffff - val) + 1)
    else:
        return val

def get_word(array, index, twos):
    val = (array[index] << 8) + array[index+1]
    if twos:
        return twos_compliment(val)
    else:
        return val

def calculate():
    # 这段代码来源于 datasheet,并做了一些优化.
    # 计算温度
    x1 = ((temp_raw - ac6) * ac5) / 32768
    x2 = (mc * 2048) / (x1 + md)
    b5 = x1 + x2
    t = (b5 + 8) / 16
    # 计算压强
    b6 = b5 - 4000
    x1 = (b2 * (b6 * b6 >> 12)) >> 11
    x2 = ac2 * b6 >> 11
    x3 = x1 + x2
    b3 = (((ac1 * 4 + x3) << oss) + 2) >> 2
    x1 = (ac3 * b6) >> 13
    x2 = (b1 * (b6 * b6 >> 12)) >> 16
    x3 = ((x1 + x2) + 2) >> 2
    b4 = ac4 * (x3 + 32768) >> 15
    b7 = (pressure_raw - b3) * (50000 >> oss)
    if (b7 < 0x80000000):
        p = (b7 * 2) /b4
    else:
        p = (b7 / b4) *2
    x1 = (p >> 8) * (p >> 8)
    x1 = (x1 * 3038) >> 16
    x2 = (-7357 * p) >> 16
    p = p + ((x1 + x2 + 3791) >> 4)
    return(t,p)
calibration = bus.read_i2c_block_data(address, 0xAA, 22)
oss = 3              # 超高分辨率
temp_wait_period = 0.004
pressure_wait_period = 0.0255 # 转换时间
# 传感器有一个出厂设置校准值需要读取
# 然后使用这些方法来获得温度和压强
ac1 = get_word(calibration, 0, True)
ac2 = get_word(calibration, 2, True)
ac3 = get_word(calibration, 4, True)
ac4 = get_word(calibration, 6, False)
ac5 = get_word(calibration, 8, False)
ac6 = get_word(calibration, 10, False)
b1 =  get_word(calibration, 12, True)
b2 =  get_word(calibration, 14, True)
mb =  get_word(calibration, 16, True)
mc =  get_word(calibration, 18, True)
md =  get_word(calibration, 20, True)

while True:
    # 原始温度值
    write_byte(0xF4, 0x2E)          # 告诉传感器测量温度
    time.sleep(temp_wait_period)    # 等待转换
    temp_raw = read_word_2c(0xF6)

    write_byte(0xF4, 0x34 + (oss << 6)) # 告诉传感器测量压强
    time.sleep(pressure_wait_period)    # 等待转换
    pressure_raw = ((read_byte(0xF6) << 16) \
                     + (read_byte(0xF7) << 8) \
                     + (read_byte(0xF8)) ) >> (8-oss)
    temperature, pressure = calculate()
    print time.time(), temperature / 10., pressure / 100.
    time.sleep(1)
要想从传感器中读取数据,首先必须读取出厂设置的校准值:
	ac1 = get_word(calibration, 0, True)
	ac2 = get_word(calibration, 2, True)
	ac3 = get_word(calibration, 4, True)
	ac4 = get_word(calibration, 6, False)
	ac5 = get_word(calibration, 8, False)
	ac6 = get_word(calibration, 10, False)
	b1 =  get_word(calibration, 12, True)
	b2 =  get_word(calibration, 14, True)
	mb =  get_word(calibration, 16, True)
	mc =  get_word(calibration, 18, True)
	md =  get_word(calibration, 20, True)
这对于每个设备来说会有差异,这些值用于计算实际的温度和压力。calculate() 函数只是对BMP085 datasheet中示例代码的直接引用,我也并不明白它的实际含义,但这段代码可以提供我们测试所需的值。
传感器测试
为了测试代码正常,将上面的代码保存到一个名为“read-pressure.py”的文件中,运行并将输出重新定向到文件,
sudo ./read-pressure.py > pressure-test.dat
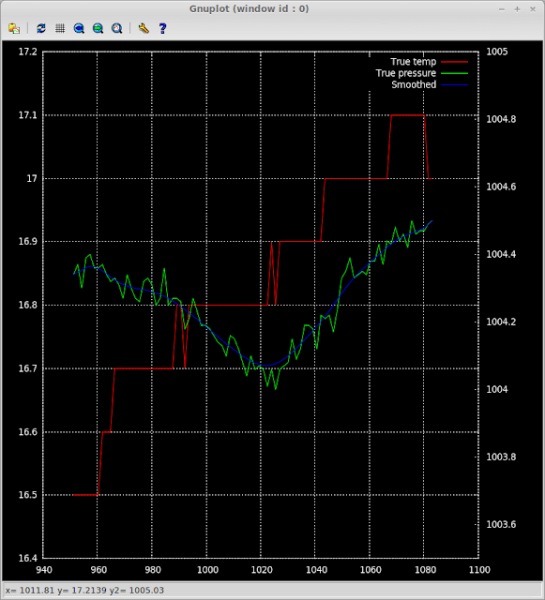
然后,我慢慢地在家里走来走去,得到了一些数据,然后用gnuplot来呈现数据,
set terminal wxt persist size 800,800 background '#000000'
  set style line 99 linecolor rgb "#ffffff" linetype 0 linewidth 2
  set key top right textcolor linestyle 99
  set grid linestyle 99
  set border linestyle 99

  set yrange  [16.4:17.2]
  set y2range [1003.5:1005]
  set y2tics

  plot filename using 1:2 axes x1y1 title "True temp" w l ,\
       filename using 1:3 axes x1y2 title "True pressure" w l, \
       filename using 1:3 axes x1y2 title "Smoothed" smooth bezier
下面是生成数据图像的命令
gnuplot -e "filename='pressure-test.dat'" gnuplot-pressure.plg
当我爬上楼梯,然后又下来的时候,可以看到气压在下降。同时可以看到温度也随之上升,好奇怪的现象,也许只是我手上的热量导致了温度升高。
BMP085海拔计算公式
计算海拔(地面高度),公式是从BMP085的datasheet中得到的。


